Set Up Your Headset
Rosetta Course™ provides you with a USB headset with a built-in microphone. The Rosetta Stone speech-recognition technology guides you to accurate pronunciation. You speak into the microphone, and the software provides feedback to help you match the native speaker.
For best results:
- Plug your headset into your computer before you start Rosetta Course.
- Move the microphone down toward your mouth.
- Use your USB headset for all your speech activities in Rosetta Course.
When you first start Rosetta Course™, you'll be prompted to speak into the microphone. The speech recognition technology adjusts to the normal tone of your voice.
 To access the Microphone Setup screen at any time, click the Preferences icon and go to Audio Settings in the Set Preferences dialog box.
To Set Up Your Headset:
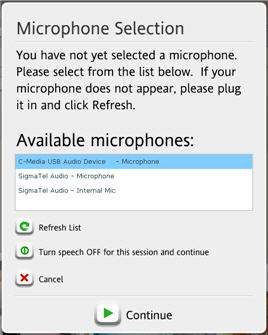
- Select your USB headset device when you see the Microphone Selection screen.
- Click Continue.
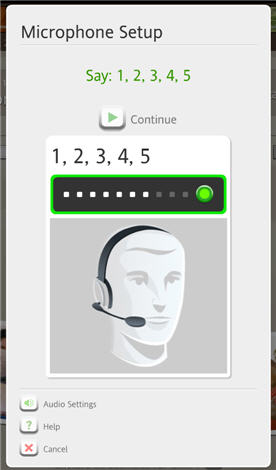
- Click Continue when the Microphone Setup screen appears.
- Speak into the microphone in a normal tone. Say “1, 2, 3, 4, 5”.
- When you get confirmation that the Microphone Setup was successful, click Continue.
Troubleshooting
If you are having trouble setting up your headset, please try the following:
- Make sure the microphone is plugged in and is not muted.
- Position the microphone correctly, as shown in the illustration. The microphone must be near your mouth to detect your speech.
- Reduce noise in your environment.
- Speak clearly and at a normal pace.
- Go to your computer's Sound or Audio settings to select your headset and adjust the volume.
- Exit Rosetta Course, plug in your headset, check your computer's Sound or Audio settings to be sure your USB headset is selected, and then restart Rosetta Course.
If you still need help, see the documentation for your computer's Sound or Audio settings, or visit Support.RosettaStone.com.
If you still need help, see:
Rosetta Stone Support Center
Headset Setup Guide